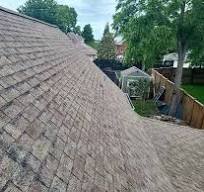
Granular loss on your roof can seriously affect its longevity and performance. If you’re based in Minnesota and are experiencing this issue, this detailed guide will walk you through the steps to repair granular loss on your roof. By following these steps, you’ll ensure a safe and effective repair process that enhances the durability of your roof.
Understanding Granular Loss
Granules are the protective coating on asphalt shingles. Over time, exposure to weather conditions can cause these granules to shed, leading to potential damage if not addressed promptly. Recognizing the signs of granular loss is crucial to maintaining the health of your roof. Typical indicators include:
- Piles of granules in your gutters or downspouts
- Bald spots on shingles
- Reduced curb appeal due to color inconsistencies
Causes of Granular Loss
Granular loss can stem from several factors, including:
- Weather Extremes: Minnesota’s severe winters and summers can accelerate granule shedding.
- Age of the Roof: Older roofs naturally lose more granules.
- Poor Installation: Improper installation can lead to premature granular loss.
Essential Tools and Materials
Before you embark on the repair, gather the following tools and materials:
- Safety equipment (gloves, safety glasses, roof harness)
- Replacement shingles or roofing cement
- Roofing nails and a hammer
- A ladder and a stable work platform
Step-by-Step Guide to Repair Granular Loss
Step 1: Inspect the Roof
Begin by thoroughly inspecting your roof. Look for areas with significant granular loss and check for any underlying damage. It’s beneficial to do this on a clear day with plenty of sunlight.
Step 2: Clean the Affected Area
Carefully clean the affected area using a brush to remove debris and loose granules. This ensures a smooth surface for applying repairs.
Step 3: Apply Roofing Cement
If the granular loss is minor, apply roofing cement. Spread a thin layer over the affected shingles and then press replacement granules onto the cement. This will restore the shingle’s protective layer and extend its life span.
Step 4: Replace Damaged Shingles
For more severe granular loss, replacing the damaged shingles might be necessary. Carefully lift the shingles surrounding the affected area, remove the damaged ones, and slide the new shingles into place. Secure them with roofing nails, ensuring they are flat and well-integrated with the existing shingles.
Step 5: Final Inspection
After completing the repair, conduct a final inspection. Ensure all shingles are properly secured and that the repaired area blends seamlessly with the rest of the roof.
Why Professional Assistance is Beneficial
Although DIY repairs can be effective, sometimes the damage may require professional intervention. Hiring a St Paul Roofing Contractor like North End Contracting can provide peace of mind. With specialized tools and expertise, they ensure your roof is repaired correctly and efficiently.
Preventative Measures to Avoid Granular Loss
To extend the life of your roof and prevent granular loss:
- Schedule regular inspections, especially after severe weather conditions.
- Keep gutters clean to prevent water buildup and granule accumulation.
- Ensure proper ventilation to reduce heat buildup under the roof.
Conclusion
Granular loss, if left unchecked, can lead to more severe roofing issues. By following this comprehensive guide, you can effectively repair granular loss and maintain the integrity of your roof for years to come. For expert assistance, consider reaching out to North End Contracting, your trusted St Paul Roofing Contractor. Whether it’s for roof repair, roof installation St Paul MN, or general maintenance, obtaining professional help ensures your roof remains in optimal condition.
By addressing granular loss proactively, you’re investing in the longevity and resilience of your home’s roofing system, safeguarding it against Minnesota’s harsh weather conditions.

